10.30.2011

Kitchen Bookcase

The bookcase was one of the first projects we started in the house, and we finally finished!  The whole project has been an exercise in patience.  We started with a tiny pantry barely wide enough for a can.  The door also opened into the doorway.  We didn't like the location so we decided to open it up into a bookcase, which makes the small doorway seem larger and can hold my large collection of cookbooks.
Original pantry with the door removed.
After taking off the door, we removed the shelves and door frame.

Pantry with door frame removed.
We had to add new drywall, because the inside was wider than the frame.  We ended up losing a few inches on each side, but we gained about 6" front to back.

New drywall.


Spackling the drywall.
So after the drywall was up and spackled and painted, we added shelves, which we didn't get a chance to paint because we just wanted it done for the housewarming party.


So we were able to get it to look OK for the party, but it was far from finished.  This is how the bookcase stayed for the next 4 months.  One of the reasons I procrastinated so much in finishing the bookcase, aside from other projects getting in the way, was that I was planning on closing in the bottom.  But then I had to cat-sit for my mom, and we realized that the bottom of the bookcase was a perfect place to put the kitty dishes.  Since we're planning on getting a dog, we decided to leave it open for future doggie bowls.

The other reason I didn't want to finish it was because I needed to spackle again.  I hate spackling.  When I originally hammered in the shelves, the drywall moved slightly, and large cracks appeared at the back of the bookcase.

You can kind of see the cracks from this distance.

And you can definitely see them up close.

So I finally decided to spackle.

And more spackle.
Sponging down the spackle.
 Ugh, that sucked.  But now it's done.  I also decided, since I had to repaint anyway, that I would paint the inside white instead of the same gray as the rest of the kitchen.  I thought it would help the bookcase to stand out and appear brighter.

Bookcase with 1 coat of white paint.

I gave the shelves 3 coats of paint on each side.
We decided that since the tiles on the floor of the bookcase are weird (because of the former door frame) that we would add a rubber mat on the floor.  It would be easier to clean when we use it for a pet food buffet, and will cover up the mess of tiles on the floor.
We picked up this rubber mat from Home Depot for $6.50.

We used a utility knife to cut the mat down.

Then we slide the mat in, and it fit!


After we put down the mat, we added the rest of the trim and put in the shelves.
After the trim was in, the base looked so much more finished.


We added the books and some other knick knacks, and the bookshelf is complete!
Finished!  The streamers are for my brother's graduation party.

yay shelves!

Completed built-in bookcase.
 So there you have it, how to make a built-in bookcase in 6 months :)

10.24.2011

The Dining Room is Trimmed!

After months of procrastination, we finally finished the trim in our dining room!  I'm really excited with how it looks.  We spent the weekend cutting, nailing, filling holes, caulking and painting, and it was worth it.  Now we can finally clear all of the power tools off the dining room table!

But first, let's look back at what the dining room looked like when we bought the house.

Taken during our final walk-through in March.
It was yellow, the floors were stained dark and there was an ugly outdated window valance.  The first thing we did was rip down the window treatments and take out the trim.  Then I spackled and sanded the walls.
Window and door trim down, walls spackled.
Having the floor refinished made a huge difference in the dining room.
Dining room with refinished floor.
Once the floors were finished we were able to start painting.
Progress of the painted dining room.
And then... we stopped.  Actually, let me rephrase that.  We stopped working on the dining room.  There were many other project that were completed in between painting and the trim going up, but for some reason the dining room never seemed to be a priority.  But with the party we're hosting this weekend, we figured it was finally time to finish it.

Matt and I have a great system worked out for installing trim.  Matt measures and cuts, I paint the cut pieces, Matt puts them on the wall, I fill the nail holes, caulk and touch up the paint.   Here's an example of why caulk is our bff:

Before caulking

After caulking
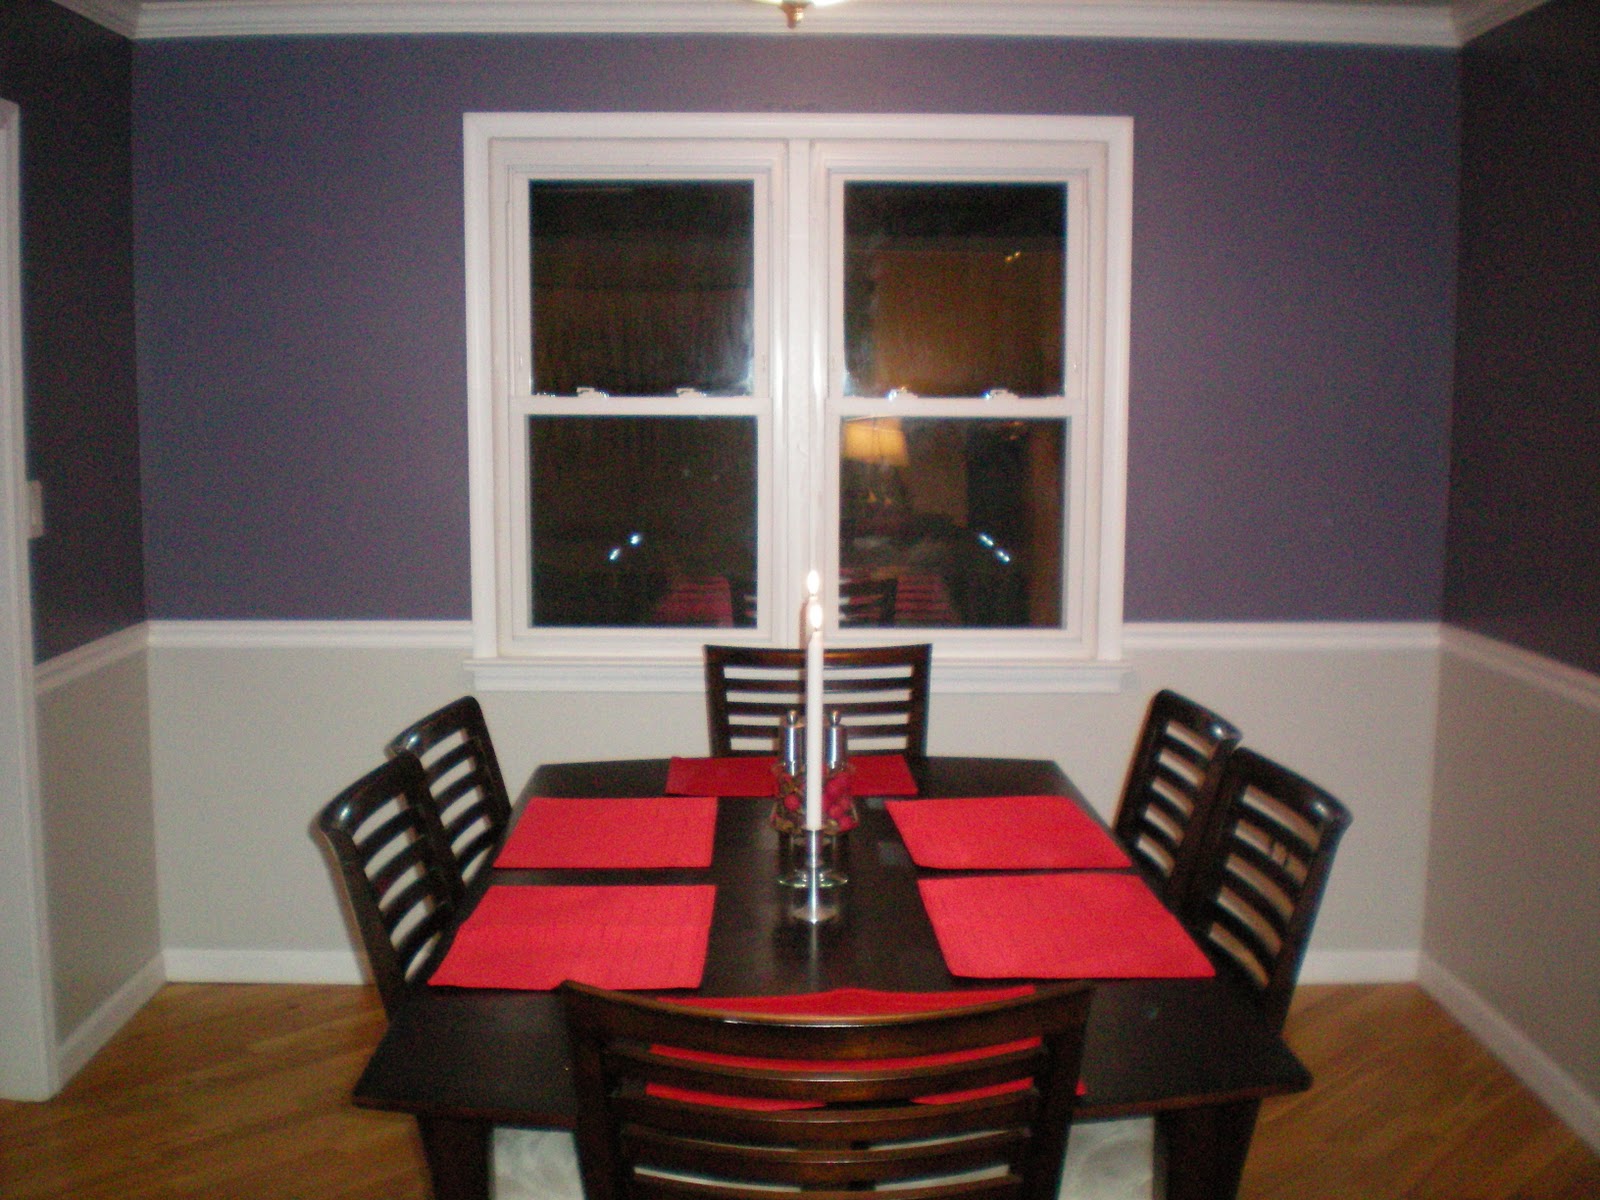
So here is the final product:


It looks pretty awesome, right?  But wait, there's more!  After taking these photos I realized that the dining room really wouldn't be complete without the curtains, so I convinced Matt to help me hang them.  I need him for these sorts of things because I tend to want things done fast, but Matt takes the time to measure twice and make sure that everything is being done properly.

Measure twice, drill once.
We decided to use the same curtains in the dining room as the living room, since it's an open space and we wanted to keep some uniformity.


 So here it is with the curtains up!  I'm really pleased with how it looks.  Obviously I still need to steam the curtains since they just came out of the packaging, but it shouldn't take too long, and we finally have them up!  I think we might be ready for this party after all :)

10.21.2011

Weekend To-Do List

So this is the last full weekend to do work before we host my brother's graduation party.  We invited our friends and family, some of whom haven't seen our house yet.  There are still some things I want to get finished before the party. 

1. Finish the bookcase.  I have procrastinated on this for a really long time, mostly because it involved spackling, and I really hate that.  But I spackled last weekend, so this weekend I need to sponge, paint and put the shelves back in.  The annoying part will be painting the shelves, since they need about 3 coats on each side, and I can only paint one side at a time. 

2. Finish the trim in the living room/dining room/kitchen.  At this point most of the trim is up, and it needs to be filled, caulked and painted.

3. Install curtains in the dining room.  Once we finish painting the trim we can install the curtains.

4. Finish the base cabinet in the kitchen. 

5. Install trim in the upstairs hallway.  We really want to do this because it will look so much better from the downstairs.

6. Finish going through the closets and decided what stays and what is donated.  I am sick of having so much stuff everywhere.  A lot of it was in boxes from college that I never unpacked and just brought to the house.

So with all this stuff to do, you will hopefully be seeing a lot of updates from me in the next week.  Wish us luck!

10.19.2011

Wait, we have a dining room?

Well, you may be surprised, as I really haven't mentioned it since we bought the house.  Honestly, I think we forget it's there sometimes.  It's embarrassing, but 90% of the time Matt and I eat our dinner in the office in front of the TV.  It's a bad habit. 

Anyway, we recently started to install trim in the dining room!  We still have a little bit left, but I thought I'd give you a sneak peek. 

Here it is with some of the base trim up.  Please ignore all the tools on the table.

The first piece of chair rail is up!

The window trim is done (well, except for the whole caulking and painting, but I'll get to that!)
 So anyway, I think this proves that we have a dining room, and in a couple of weeks it's going to look awesome! 

I've also been busy planning my brother's graduation party.  Steve graduated from Penn State in August, but my mom has been sick, so we postponed his party until she was feeling better.  Well, it's almost here!  We're rushing to get the house put together and get everything prepared for his party on October 30th.  Wish us luck!

10.16.2011

Flea Market Finds

Yesterday I went to an annual fall festival at a church near my mom's house.  We've been going there every year since I can remember, and I've always loved it.  When I was a kid I liked it for the toys and petting zoo, as a teenager for the used books and now for the housegoods.

I should probably explain this better.  The festival is a fundraiser for the church, where the main appeal is people bringing in donations, and then selling them.  For almost nothing.  They divide the donations into different rooms, a kid's toy room, a book room, and a general flea market room.  They also have food, homemade crafts and an auction for larger/more expensive items. 

People start lining up to get in around 9:30am.  I went with my mom and grandparents, and we got there around 9:50.  After waiting outside for 10 minutes (luckily this year it was gorgeous weather, because last year it was rainy!) they let us in, and we headed straight towards the flea market.  I didn't get any pictures when we first got in, because I was too busy looking at everything, and it was reaaaalllly crowded, but here's what it looked like around 11:00, when people started clearing out.

This was taken after it cleared out!

They have a lot of cool stuff, like the stars at the bottom of the photo.

They also have a huge selection of frames and pictures.

So now on to what I bought.  Like I said, it's kind of crazy in there, so I didn't take photos of anything until I got home.  I saw some really cools pieces, but I tried to limit myself.  Here's what I came home with:

This oval mirror is a little bit beat up, but after I wash it and add some new paint, I think it will really brighten it up.  I got it for $1!

I don't really have any Christmas decor, and these Santas were only $.50 each.

I forgot to take a picture of this bowl before adding my vase fillers, but I bought it for $.25.


I also picked these up on a whim.  They are really cute, and they were $.50 for the pair.
I also picked up a jar of homemade apple butter for $6, and some books for $2.50.  So my total for the day was $11.50.  Not too bad, right?  I'm excited to start updating the mirror and owls. 

10.13.2011

Canvas Inspiration

About a month ago, I went to JoAnn's for some fabric, and noticed they were having a sale on canvases.  I grabbed four 12"x12" canvases on a whim (they were only $2 each!).  Now I'm trying to figure out what to do with them.  Here are some inspiration photos I've been looking at:

via Virginia & Charlie
The first idea is to use puffy paint to create a design, and then paint the entire canvas one color.  I kind of like the simplicity of the pure white canvas with a textured design, but I would probably paint it a different color to correspond to colors in whatever room I use it in (probably either the office or our bedroom).

via Ready Made
 This canvas seemed like a pretty easy project.  Basically, you put masking tape or painters tape in random lines over a canvas.  Then you spray paint the canvas, let it dry, and pull off the tape.  I love the blue, which is very similar to the color we chose for our master.  I'm not sure if this would work as well on the smaller canvases as it does on the larger one.

via Mint Love Social Club
This is another easy solution.  Glue large sequins to a canvas.  This might be interesting to do as a vertical series, with the bottom more heavily populated, and the top more sparse.

via Etsy
This would be a little more difficult to make, because it's the only one that actually requires some painting skill.  It's also the one I like the most.  I would probably use different colors, but I love the offset flower pattern.
via Etsy
I love the 3D aspect of the flowers on the canvas.  I also love the dirty turquoise background.  I would just have to think of the perfect book to pull pages from for the flower petals.

So which canvas is your favorite?  I'm leaning towards the painted flower, but I still love all of them.