Showing posts with label diy. Show all posts

4.12.2015

Stairs

Disclaimer: I actually wrote this post a couple of months ago, but I kept forgetting to post it!

I decided to start the new year off right with finishing a project that has been going on almost since we bought our house. 

I don't have many great photos of the upper stairs from before we moved in, but they weren't in the best condition.  They were plywood, which had obviously been covered with carpet at some point, and then ripped off and refinished in an unattractive orange/brown stain. 


Very early in the renovation process, we started sanding the stairs, with the hope of refinishing them.  Unfortunately, there was a lot of water damage on the bottom two steps, and we had a hard time sanding it away. 

Eventually we just gave up, and went on to other projects, pushing the stairs out of our minds as much as you can ignore something that you see every day. 

Three years passed, and we ignored the stairs.  Until one day, a friend of mine redid her stairs, and they looked amazing.  I was so jealous, and also impressed.  She had a whole flight of stairs and I only had six!  Why was it taking me so long?  I'm nothing if not competitive, so I decided that it was time.

Matt and I talked about it, and he finally convinced me to use stair caps instead of trying to sand and re-stain the stairs.  I'm so glad he did, because the finished product looks so amazing.

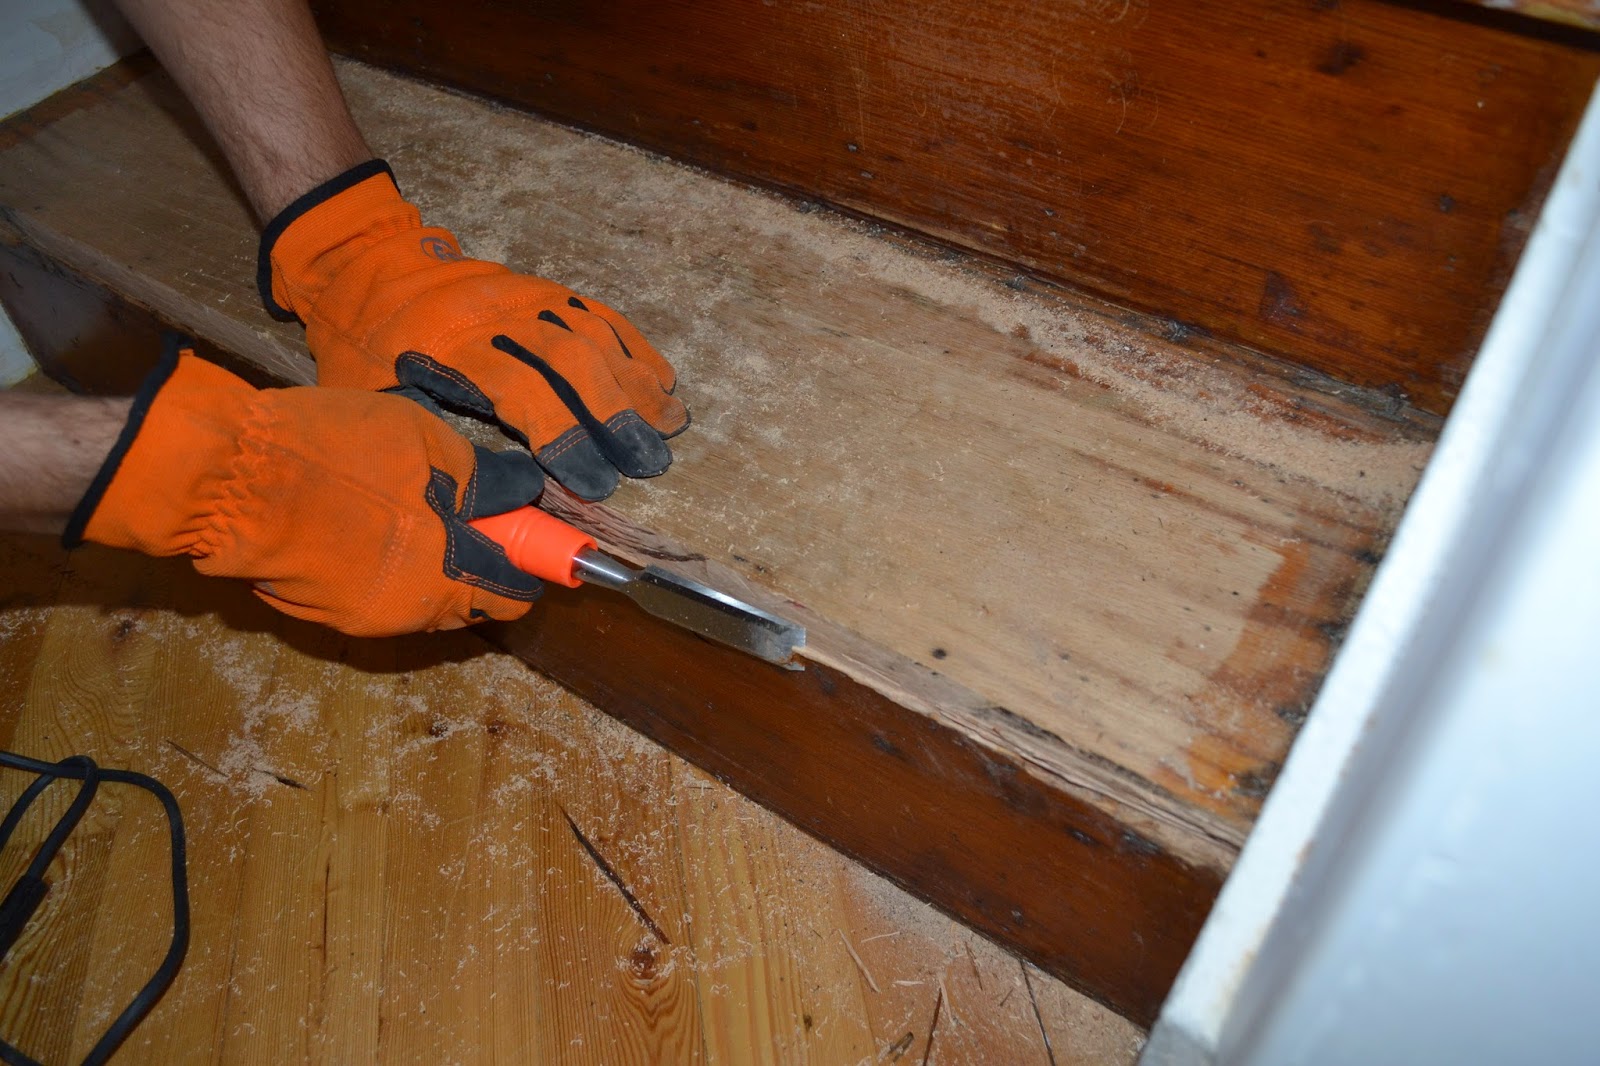
We had to cut off the noses of the current stairs, which we did with a circular saw.  Since the saw didn't cut to the edges, we chiseled the rest of the wood off.  During this time I realized how fun chiseling is, and I'm sad I haven't had a chance to do it before now.  Our stairs were very creaky, so Matt sunk some screws down, and now they are much quieter. 


Next, we cut the treads to the width of the stairs using a miter saw, and cut the depth with a table saw.  This was probably the most difficult part.  It took about three hours to cut the 6 treads and risers to size.  We had to do this part in order from bottom to top, so that we could get the measurements for each subsequent stair.  We made sure to write the number of the stair on the back of the pieces, so it was easy to remember for later.


After the treads and risers were cut, I stained and painted them.  It was easier to do this before they were installed, because I didn't have to worry about it drying or running or the dogs trying to go up and down the stairs.


It took 3 coats of stain to get the color I wanted, and I also did 3 coats of white paint on the risers.  While I was working on the caps, Matt was filling the holes left by the previous treads, and sanding down the trim a little bit, to give in a newer look.


I painted the trim around the stairs before installing the stairs, and it already looked so much better.

Finally, we were ready to install the stairs.  I borrowed a nail gun from a friend, and we got to work.  Once everything was set up, installation went very smoothly.  We worked from bottom to top, spreading a generous amount of liquid nails over the stair surface before attaching the wood caps.  Then we added the nails.  We used 4 for the risers, and 6 for the treads.  Luckily, because of all our prep work, this part went very smoothly, and we finished in about an hour. 


After the stairs were installed, we still had to caulk around the edges of the boards, fill in the nail holes, and add a coat of polyurethane to the treads.  I wanted to do this after it was installed so the nail holes would be filled in, and hopefully not as noticeable.   


After all of that, our stairs are finally finished!  I'm so happy to have them done, and I keep staring at them when I pass by.  Now all we need to do is finish the banisters, and the stairs will really be done!

9.07.2014

Major Backyard Update - Part 2

Matt and I have had a super busy summer.  I had two very time consuming classes, and Matt was working a lot of nights and weekends.  But in between all of that we were still able to put some work into the backyard, mostly during this past week.  We took off of work and spent most of the time trying to get our backyard in order.  We were able to get a lot done, and we're much closer to our new and improved patio.  Here's what we've done so far:


I'm really happy with how much we've gotten done.  We've definitely been able to cross a lot off of our list.  

Backyard Project List:
-Move a/c unit (this is the one thing we hired out - don't want to mess with Freon!)
-clean, sand, and stain deck
-paint under deck
-replace deck railings
-replace deck stairs
-grind patio
-fill cracks in patio
-resurface patio
-build retaining wall around patio
-remove concrete walkway
-install patio addition
-complete landscaping
-replace back lights

We are planning on finishing the deck stair railings and the patio before winter.  Then next summer we'll tackle resurfacing the patio and the landscaping in the spring.  It's so nice to have a larger area to hang out!  I'm looking forward to next summer when we can enjoy the patio without having to work on it!

6.25.2014

Major Backyard Renovation - Part 1

So for most of this year it's been radio-blog-silence from me, but that doesn't mean I haven't been busy.  Actually, it means I've been so busy I haven't had much time for hobbies.  Work and grad school have been getting in the way of me having a life recently. 

However, Matt and I are determined to complete our backyard project(s) this summer.  We want to actually enjoy our backyard, and we've been working hard for the past month.  There is a long list of projects that we have lined up, but we're well on our way to getting there.  As usual, we're doing 90% of the work ourselves, so it's taking a while.  Here are the "before" photos.


Backyard Project List:
-Move a/c unit (this is the one thing we hired out - don't want to mess with Freon!)
-clean, sand, and stain deck
-paint under deck
-replace deck railings
-replace deck stairs
-grind patio
-fill cracks in patio
-resurface patio
-build retaining wall around patio
-remove concrete walkway (we may hire this out as well)
-install patio addition
-complete landscaping

Whew!  Consulting the list it doesn't seem like we've done too much, but we've done preliminary work for the stairs, and I'm very close to finishing the deck railings.  Once I remove the old stairs I can use the new paint sprayer that Matt got me for my birthday and paint the bottom lattice.  I started to paint with a brush and then realized how ridiculous I was.  The paint sprayer should be much more efficient. 

So anyway, here's what we've done:

Deck stripped with the railing removed.
 
Kiwi helped to get the railings ready!  Holes were drilled into the wood at 4.5" intervals, which keeps the railings to code.  The aluminum posts are .75" wide, so there is 3.75" between each baluster. 

I gave up painting the bottom by hand, but I should finish it soon with the paint sprayer.
 
Stained deck ready for railing!

I started by attaching all of the bottom wood rails to the posts. 

Next I put all of the aluminum balusters in the bottom rail, and lined up the balusters with the top rail.  Then I attached the top rail to the post. I will be putting a 2x6 across the tops of the rails, which will finish it.

The pressure treated wood I used for the new railings (and will use for the new stairs) takes 6-8 weeks to dry out, so I'll be staining those parts to match the rest of the deck towards the end of the summer.  If you stain the wood before it's dry the stain might peel or bubble. 

We ground down the patio and filled in the huge, and not so huge, cracks.  We will be adding a flo coat to entire patio to even it out and add a nice finish. 

So there you have it!  We are working hard, and hopefully I'll have more updates soon!

1.06.2014

Office Redo

I think out of all of the rooms in my house, the office has been updated the most times.  It was the very first room that I painted, and I was never truly happy with the color.  I remember pouring it in the paint tray and thinking "I really hope that looks better when it's dry." 

And it did look a little bit better.  For a time.  But the longer I lived with it, and the more I got to figure out what colors I liked and my personal style, I realized that it wasn't working.  So I started trying to figure out what would work.

I've been wanting to do a dark colored ceiling for a while now, and I figured this would be the perfect time to do it.  Matt got to choose the bright orange of his band room, so I should be able to do a dark ceiling for my office.  But what color?

I bought samples of purple, green, and gray.  But in the end I decided on a gorgeous blue/green color. 


The color I ended up with on the walls is Rock Candy by Sherwin Williams.  The ceiling color is Martha Stewart's Plumage, which I had color matched to Sherwin Williams.
 
 
I installed a new semi-recessed light fixture on the ceiling.  I also added a new mirrored desk lamp, which I got at Target. 

 
I made the desk from several Ikea pieces.  I used 2x2 Expedit shelves for the sides, and a Linnmon table top.  I'm really happy with this, because I was looking for a large working space and a lot of storage, and this has everything I wanted.  My dad gave me the drawer inserts for Christmas, so I installed them for even more storage options.  The purple baskets are great for holding craft supplies, or will be good for school books when I start grad school this March. 


I still need to put in trim and closet doors.  I'll also probably change the window treatments, but for the moment I'm just enjoying the calming blue ceiling and massive workspace I now have. 


And really, the biggest test of a room is whether the dogs are comfortable, so I think we're good with that!


5.13.2013

Powder Room Ideas

Like everything in our house, our downstairs powder room is pretty beat up.  When we bought the house the powder room had a lovely fleur de lis motif, with a wall of 12"x12" stick-on mirrors.  In my initial fit of destruction, I removed the mirrors and fleur de lis fixtures, leaving it looking even more damaged than originally. 
 
The bathroom during our final walk through.  Please excuse the gross toilet - Matt took the photo and didn't think to close the lid first!

I don't know if you can tell in the above photo, but the back of the toilet stuck out about 4" from the wall before we removed it.  After we took it out I measured the rough in and saw that it was 14", instead of the typical 12".  So we ordered a 14" rough in toilet so it should sit closer to the wall, and not make you feel like you're sitting in the middle of a room. 

We will also be getting a new sink, because I "accidentally" chipped the vanity top when I was trying to pry it off.  Luckily we were able to save the melamine from the vanity base, and are re-using it as shelving.  We ended up getting a square top pedestal sink.

Here is my inspiration for our new and improved powder room

source: http://www.houzz.com/
I love the grasscloth wallpaper with the beadboard around the bottom.  I think it makes the room look bright and sophisticated.  The brighness is especially important in our case because we don't have a window in that room.  

Right now we have the wallpaper and floor installed, and I've been working on the beadboard and trim.  It's frustrating because none of the walls are even, but caulk is my friend and I'm pushing through.  I'm really hoping to have this done in the next couple of weeks.